How to Properly Load Motorcycles When Camping: 6 Considerations

Load & Go: Turning Your Motorcycle into a Safe and Effective Pack Mule
Let’s think about loading up that motorized mule of yours for a motorcycle camping trip in a little different way: center of gravity.
There’s no shortage of articles suggesting what kind of gear and provisions to take on such a journey. But there’s not so much about how to pack and stack all that stuff on the bike. The weight of your gear and provisions could be substantial—even if you really focus on keeping the load down to the minimum.
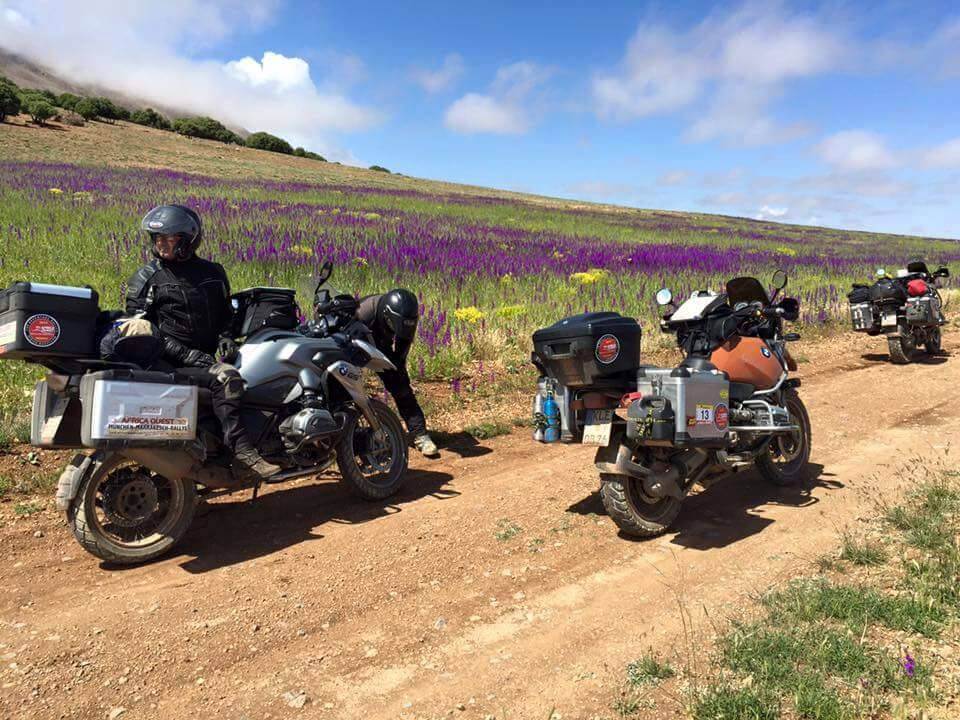
The configuration of your bike may start out with a higher center of gravity by design; for example, adventure bikes like the venerable BMW R 1200 GS typically are designed with a lot of ground clearance whereas conventional motorcycles or cruisers tend to have less ground clearance with the engine, transmission and other heavy parts slung down low.
As the weight of the load increases, and the height of the load gets higher off the ground, the handling characteristics of the bike will change, sometimes pretty drastically. This equates to some issues; cornering and braking behavior on- and off-road can be altered to the point of dangerous unpredictability.
Following are some tips to properly load your motorcycle for a trouble-free motorcycle camping trip.
- Low and Balanced Weight
With all that said, it’s a good idea to keep weight down low and balanced from side to side to the greatest extent possible. How? By packing the heavier items in the bottom of the panniers, except perhaps those items that you may want to have access to without having to unload other stuff for the campsite.
This principle is particularly important if you are riding a standard-style motorcycle, sport bike, or cruiser that normally has a low center of gravity but will be using one of the many vertically stacked travel packs that attach to your backrest or luggage rack.
Since these types of luggage can hold loads of gear when fully loaded, they are great for long distance touring/camping. But limiting the contents of the top barrel of the bag to light, quick access stuff like rain suits, extra gloves, an extra jacket, and so on is a good strategy. The lower compartments can handle heavier items with a little less adverse effect on weight distribution, but since the travel pack also carries the load aft of the rear axle, it could affect handling in strange ways when really loaded down. Also, be sure to check out the safe maximum load specified for your luggage rack to keep from overloading it.
- Securing the Load Part I: Classic Bungees and Cargo Nets
Safety in traveling with a big load of gear also depends on making sure what you load—no matter where you load it on the bike—stays where you put it when you’re underway, whether at Interstate speeds or puttering along on a rough back woods track.
Bungee cords and cargo nets are very handy, but since they are flexible, things can move when they are in use. Their attachment points, typically little metal hooks, can also play havoc with paint surfaces that they are connected to, so use bungees and cargo nets with caution. Consider a couple of wraps of electrical tape at connection points to protect paint or chrome. Never attach bungee or cargo strap hooks to side covers or any plastic parts, cables or hoses; this can cause some unwanted scratches on your motorcycle’s aesthetics.
Nobody would be that careless, right? You would think—but we’ve seen it done! Check these vintage strap situations often to make sure they haven’t come loose; aren’t causing damage; securing what’s in place; and they haven’t failed; we’ve all seen those half pieces of broken bungee cords along the road.
Time saver tip: remember to pack extra carrying straps.
- Securing the Load Part II: Cargo Straps
Using cargo straps with either cam-lock or ratchet-style mechanisms is a better option than the usual bungee straps or cargo nets. These provide a high-strength way to secure things, but again, once in motion bumps and road vibration can cause things to move and slip, making the straps loosen and creating the potential for gear to part company from the bike while underway. Like bungees and cargo nets, stop and check your load often, retightening the cargo straps each time.
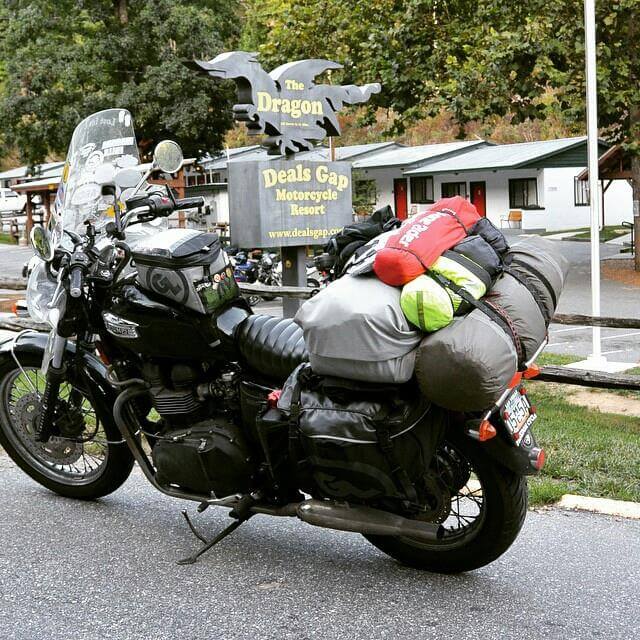
Cargo straps tend to have a lot of length, making it possible for lots of extra strap to be flying around once things are cinched up. Getting that high-strength nylon strap material tangled in your rear wheel or drive chain can jam things up and cause serious problems. Be sure to secure those loose ends or cut the excess off so that even if it came adrift, it couldn’t get down near the wheel. Cargo straps can also be very handy setting up camp, so carry extras of those, as well.
- Luggage Attachment Paranoia: A fix
In our paranoia about losing saddlebags, tail bags and other luggage while riding, we have nearly always not trusted the standard equipment attachment buckles and straps that come with them. Think of items like soft saddlebags that have that zip-off from the cross-strap for easy toting as hand luggage. Even if the nylon straps and buckles appear robust, we know the zipper, buckles, stitching and straps can fail under heavy load, especially under the shock loading of rough roads and trails.
So, as an added safety measure, we buy those giant cable ties (also called zip ties) that are really long—favorites are the 14” and 26” items—and thick. With these, we can thread them through the bags and around the top frame rail of the bike so that even if the standard attachment straps fail under the load, the giant cable tie prevents the bag from coming off. When those aren’t long enough, you can zip two or more together for nearly any length you need.
True story: at a stop with a fellow rider in America, his bike had a large barrel-style tail bag that comes only with a big strap to go around the backrest for attachment. Some rube tried to grab and run with the bag. Had he relied on the strap it came with, this crook probably would have gotten away with it. Unfortunately for the moron would-be thief, our fellow traveler had punched four holes in the bottom of the bag and threaded two of the giant cable ties through to attach it to the luggage rack. That bag wasn’t going anywhere.
- Weather Protection
Once you have things attached, think about weather protection. If you hit bad weather, you don’t want the gear you are counting on to be your dry, warm respite against cold and damp to be, well, cold and damp. For added protection, even for those items stowed away in “waterproof” panniers, tail bags and so on, consider packing these essentials stay dry in gallon- or quart-size ziplock bags. We’ve had success with for priceless equipment such as cameras and laptops, even when stowed in “weather-resistant” panniers.
Some travel packs, tail bags, tank bags and panniers include weatherproof inner liners or outer covers. Double-check to make sure any outer covers properly secured, especially when the fun high-speed mind-releasing rides arrive on the highways.
The zip-lock bag approach is handy for things that can get wet inside your luggage, as well, such as plastic bottles of ice-cold water in the saddle bags. Water bottles are obviously needed, and better cold, but condensate can form and get things around them pretty wet. Don’t laugh, but when one of our riders takes a couple of bottles of ice water out on a road trip, he drops them into one of those nifty purple Crown Royal bag for extra insulation before putting them in a gallon zip lock bag. That combination keeps the water cool a little longer, keeps condensation from forming on the outside of the plastic bag, and if the water bottle leaks, it keeps the rest of the stuff in the saddle bag dry. This also your Crown Royal at optimal temperature for the motorcycle campsite, also.
- Load Capacity of Bags: Is it in check?
On the subject of saddle bags/panniers, this may sound over the top, but check out the rated load capacity for your bags. Overloading them could cause hard bags to have attachment mechanism failures, and soft bags could even have seam failures in the bottom. We know a rider who once bought a beautiful set of semi-rigid saddlebags at a yard sale, which seemed to good to be sold so cheap. Then he discovered that the main seam had failed completely on one of the bags.
The bags seemed well built, and he didn’t know what could have been in the bag heavy enough to cause the double-stitched seam to rip out, but evidently the contents of the bag wound up on the pavement. Whatever it was, he wagered it was considerably heavier than the rated cargo capacity of the bag. Lesson learned.
Well, there are some tips on packing up to get on down the road or trail. The only thing left to say is ride safe and “Happy Trails!”